

In order to use the blockchain, you need to install an application that allows you to interact with the Ethereum blockchain. One of the most popular dApp’s (Decentralized Applications) is known as Metamask. Follow the first set of instructions to install it on the Chrome browser, once we’ve done that we’re ready to unlock the power of the Blockchain on our browser!
Follow the steps below to download and install Metamask for your browser:
- Visit the link here to install Metamask to your Chrome/Brave browser.
- Click “Install Metamask for Chrome”

- Click to “Add to Chrome” and “Add Extension” follow the prompts until your installation is complete
- You can verify that MetaMask is installed if you see the fox icon below in your Chrome Extension toolbar:

How to use Metamask
One of the first tasks you will want to do on Metamask is to install a wallet to hold your cryptocurrencies. To do this, we have a few steps outlined below:
- Click on the Metamask icon seen above, it should be in your browser extension toolbar.
- Read and agree to all the terms and conditions and follow the prompts.
- You’ll then be asked to create a password and given a “Secret Recovery Phrase”. This is a 12 word phrase that makes it easy to back up your account and import it anywhere. KEEP THIS PRIVATE AND IN A SECURE PLACE. Without this, if you forget your password you’ll need this phrase to restore your account.
- Click here to download the phrase as a file and keep it stored in a safe place. Do not allow anyone but yourself access to this phrase:

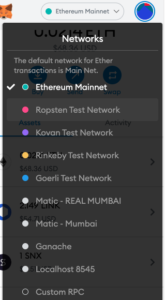
- After this, you’ll now have access to the Ethereum Networks! Now we are able to access the Mainnet and Testnets from the top right corner where it says ‘Ethereum Mainnet:
Swapping Tokens
Now that we’ve got our wallet setup and have access to all of Ethereums test networks and mainnet. Let’s get some test ether in our wallet and swap them for other tokens!
First, we want to select ‘Ropsten Test Network’ as we want to send ourselves some test/play Ether to demonstrate how we can swap tokens. Once, you’ve selected the test network click HERE to the Test Faucet. This allows us to get 1 test Ether sent directly to us! (This Ether has no real value and is only for testing purposes). Make sure your wallet is connected to the Ropsten Test network and you should see a green button that says ‘request 1 ether from faucet’. You will see a Metamask prompt asking you if you want to connect to the test faucet. Click ‘Next’ and then ‘Connect’.
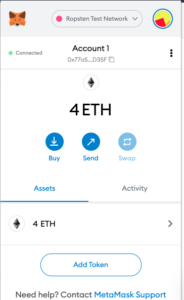
Now we’ve authorized our Metamask wallet to interact with the test faucet. Select the same ‘request 1 ether from faucet’ once again. This time you won’t see a prompt but you should see 1 ETH (or more if you clicked more than once) show up in your wallet balance:
Now we’re ready to swap our ETH for other tokens. Visit Uniswap (Uniswap is a DEX platform that allows you to swap swap different tokens) and click on ‘Connect your wallet’ in the top right corner. This will be the same process as the test faucet. This is Metamask’s way of asking us if we want to authorize any blockchain apps connecting to our wallet. Now you should see the following dropdowns:
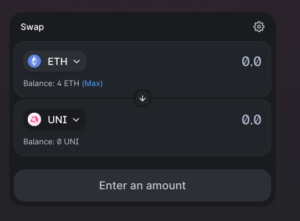
If you don’t see UNI (Uniswap’s governance token) in the second list, click the dropdown and select it from the list. Now, let’s swap 0.5 of our test ether for some UNI:
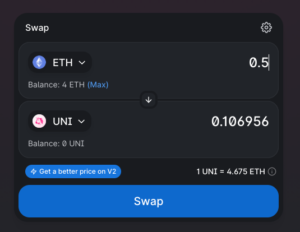
Select ‘Swap’ and you should get another Metamask popup asking you to confirm this transaction:
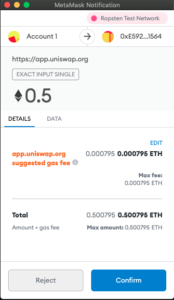
The number ‘0.5’ at the top is the amount of ETH we are swapping for UNI. Below that, Metamask is determining the optimal gas fee for the transaction. (More to come on gas fees and what it means for Ethereum/Defi coming soon!). Gas fees are essentially transaction fees that help maintain the network.
Now let’s hit confirm and wait for our swap to complete. You should see the following prompt:
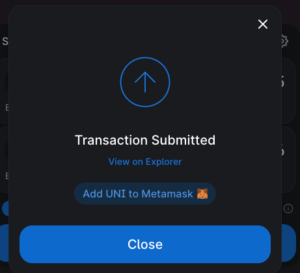
What is happening now is the transaction is being confirmed on the Blockchain by ‘miners’ or ‘stakers’ depending on what type of consensus algorithm is being run on Ethereum. Once this process is complete you should see a notification. Notice your ETH balance has decreased by 0.5. Now let’s open our Metamask and see where our new UNI is.
Select ‘Add Token’ and paste in the following Uniswap contract address. This will let us see UNI as a part of our asset collection:
Uniswap token address(Ropsten): 0x1f9840a85d5af5bf1d1762f925bdaddc4201f984
Once you’ve entered the address you should see your UNI token balance that we just swapped for!
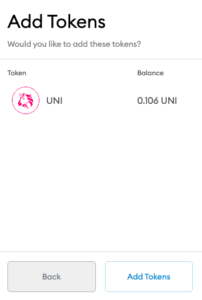
Select ‘Add token’ and now we can see our UNI tokens alongside our ETH tokens:
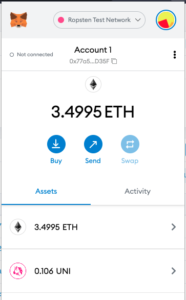
Congratulations! You’ve now got your wallet setup and have completed a token swap. This same process would work the same way if we had real ETH and were on the Mainnet. This is just scratching the surface and serves as an intro to the amazing world of DeFi. Stay tuned for more DeFi and Blockchain tutorials from us at Build Your Blocks! Let us know what you thought about this tutorial and what you’d like to see more of in the comment section below.
