NFT’s (Non-Fungible-Tokens) have been a hot topic in the blockchain space in 2021 and now it seems more businesses and applications are adopting them. Let’s walk through exactly what they are, how they work and then let’s mint our very own NFT on the Ethereum Testnet!
NFT’s are not like traditional tokens and coins like Bitcoin, Ethereum, Cardano or Polygon. All of these coins are created equally and are uniform. That means, my Bitcoin is the same as your Bitcoins on the blockchain, there is no unique identifier between our Bitcoins. NFT’s however are unique. NFTs on the Ethereum network use two popular token specifications, ERC-721 and ERC-1155. In a nutshell, these standards tell the blockchain that these tokens are unique items. Think lottery or show tickets, digital collectibles, artwork, anything that is unique in nature can be tokenized into the digital world, using the specifications mentioned above. An artist or a brand can mint NFT’s that display their artwork or media and they can be bought and sold the same way you would sell a hard asset.
Wait, can’t I just take a picture or save the file the NFT creator mints? Yes, and no. You can save that file as a JPEG or a video file on your computer, but you don’t own it. The token address belongs to a wallet address. The owner of the digital NFT has that token in their wallet and can prove ownership this way, this is what gives the NFT its value. The same way millions of people have taken pictures of the Mona Lisa, but the real value is the original artwork itself. Let’s create a unique NFT on our own. At Build Your Blocks, we’ve built an NFT minter that allows you to simply drag and drop media assets into our app and mint them on the blockchain. From there we’ll actually be able to see it in the marketplace (https://opensea.io) however in this case we’ll be using the test network, but it would work the exact same way with real money on the real Ethereum mainnet. First, we’ll need an image/gif that we want to mint as our asset. Second let’s navigate to our app: HERE. Now we’ll need to have some amount of test ETH in our Metamask wallet and be on the ‘Rinkeby Test Network’ to create this NFT. Since we’ll need to pay gas fees on the network, we’ll be assuming it’s already set up at this point. If you don’t yet have a metamask setup, please have a look at our earlier post here to see how to get that setup. Once you’re on the minter screen, you’ll see the following screen:
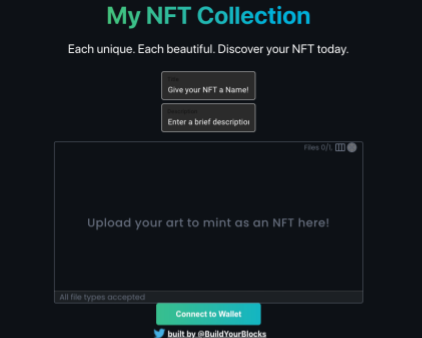
First, we’re going to need to Connect to Wallet. This will let our dApp talk to your wallet:
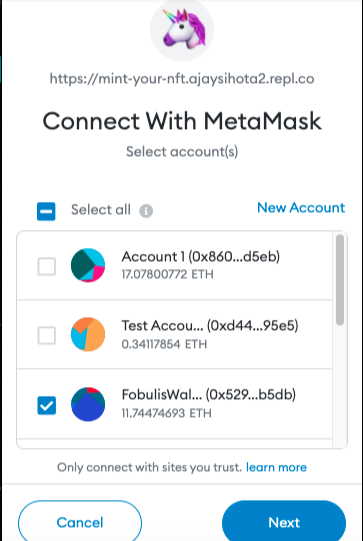
Follow all the prompts then you’ll a “Mint NFT” button appear!
We’ll now have 3 fields we’ll need to provide. First, we give our NFT a name, then a description and then upload an image to go along with it. For myself, I’ll be minting a Charizard from everyone’s favorite childhood series, Pokemon.
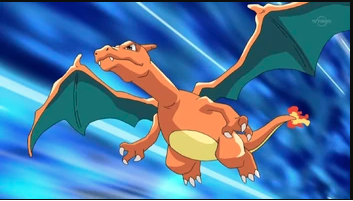
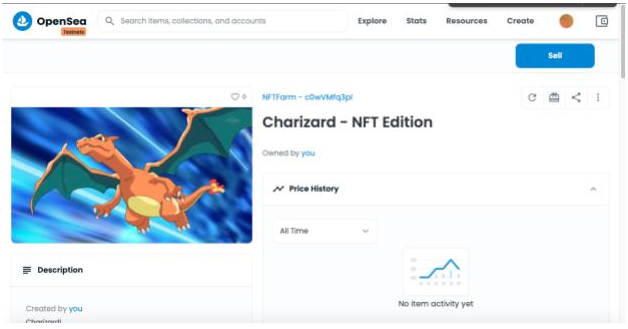
We’ll give him a name of ‘Charizard – NFT Edition’, a short description, then we’ll upload the image above and hit the new “Mint NFT” button.
You will then be prompted by MetaMask to confirm the transaction and pay the test gas fees. (It’s just test Ether on the Rinkeby Test Network, not real money). Once your transaction is confirmed and successful you will get a link to view your newly minted NFT!

My link is : https://testnets.opensea.io/assets/0xC50f8A1bA5bccd3b1aDC4cAF3132b139C0dB0039/20
Now you can see your brand new NFT on any marketplace using the address and the id number in the URL!
It is now owned by you since you’ve minted it. You can hold it or sell it! This would work the same way on the real mainnet and can be traded for real $$$! We hope you found this post helpful in understanding NFT’s and how we can create our own. Stay tuned for our next post on where we walkthrough creating entire collections of our own NFT like CryptoPunks and Bored Apes!